
We’ve decided that this is the perfect place to showcase some of the crafts & science projects that we test out in our classroom. Many of our ideas come from other teaching websites & blogs, and MANY of our ideas come from Pinterest, but some of our ideas are just our own, and we think it’s time to start sharing them with the world! With nearly 30 years of experience between the two of us, Misty and I are quite the crafty preschool teachers and we’re constantly coming up with ideas for themes, animals, letter of the week, how to teach a concept, how to provide good experience for manipulatives, and how to best make the project fun for each child in the class. We will take a few step-by-step photos so that we can give a quick little tutorial on how to make some of our crafts or projects.
During the month of October we made a ton of fun & sensory related projects, and many of them turned out to be “firsts” for us. We’re in the middle of assessing our students right now to see where their skill sets are so that we can hone in on skills that each child needs to work on throughout the rest of the school year.These projects were created with student ease and action in mind, and we’ve really been focusing on fine motor activities to strengthen those little fingers, a great precursor to some of the skills we’re looking for right now.
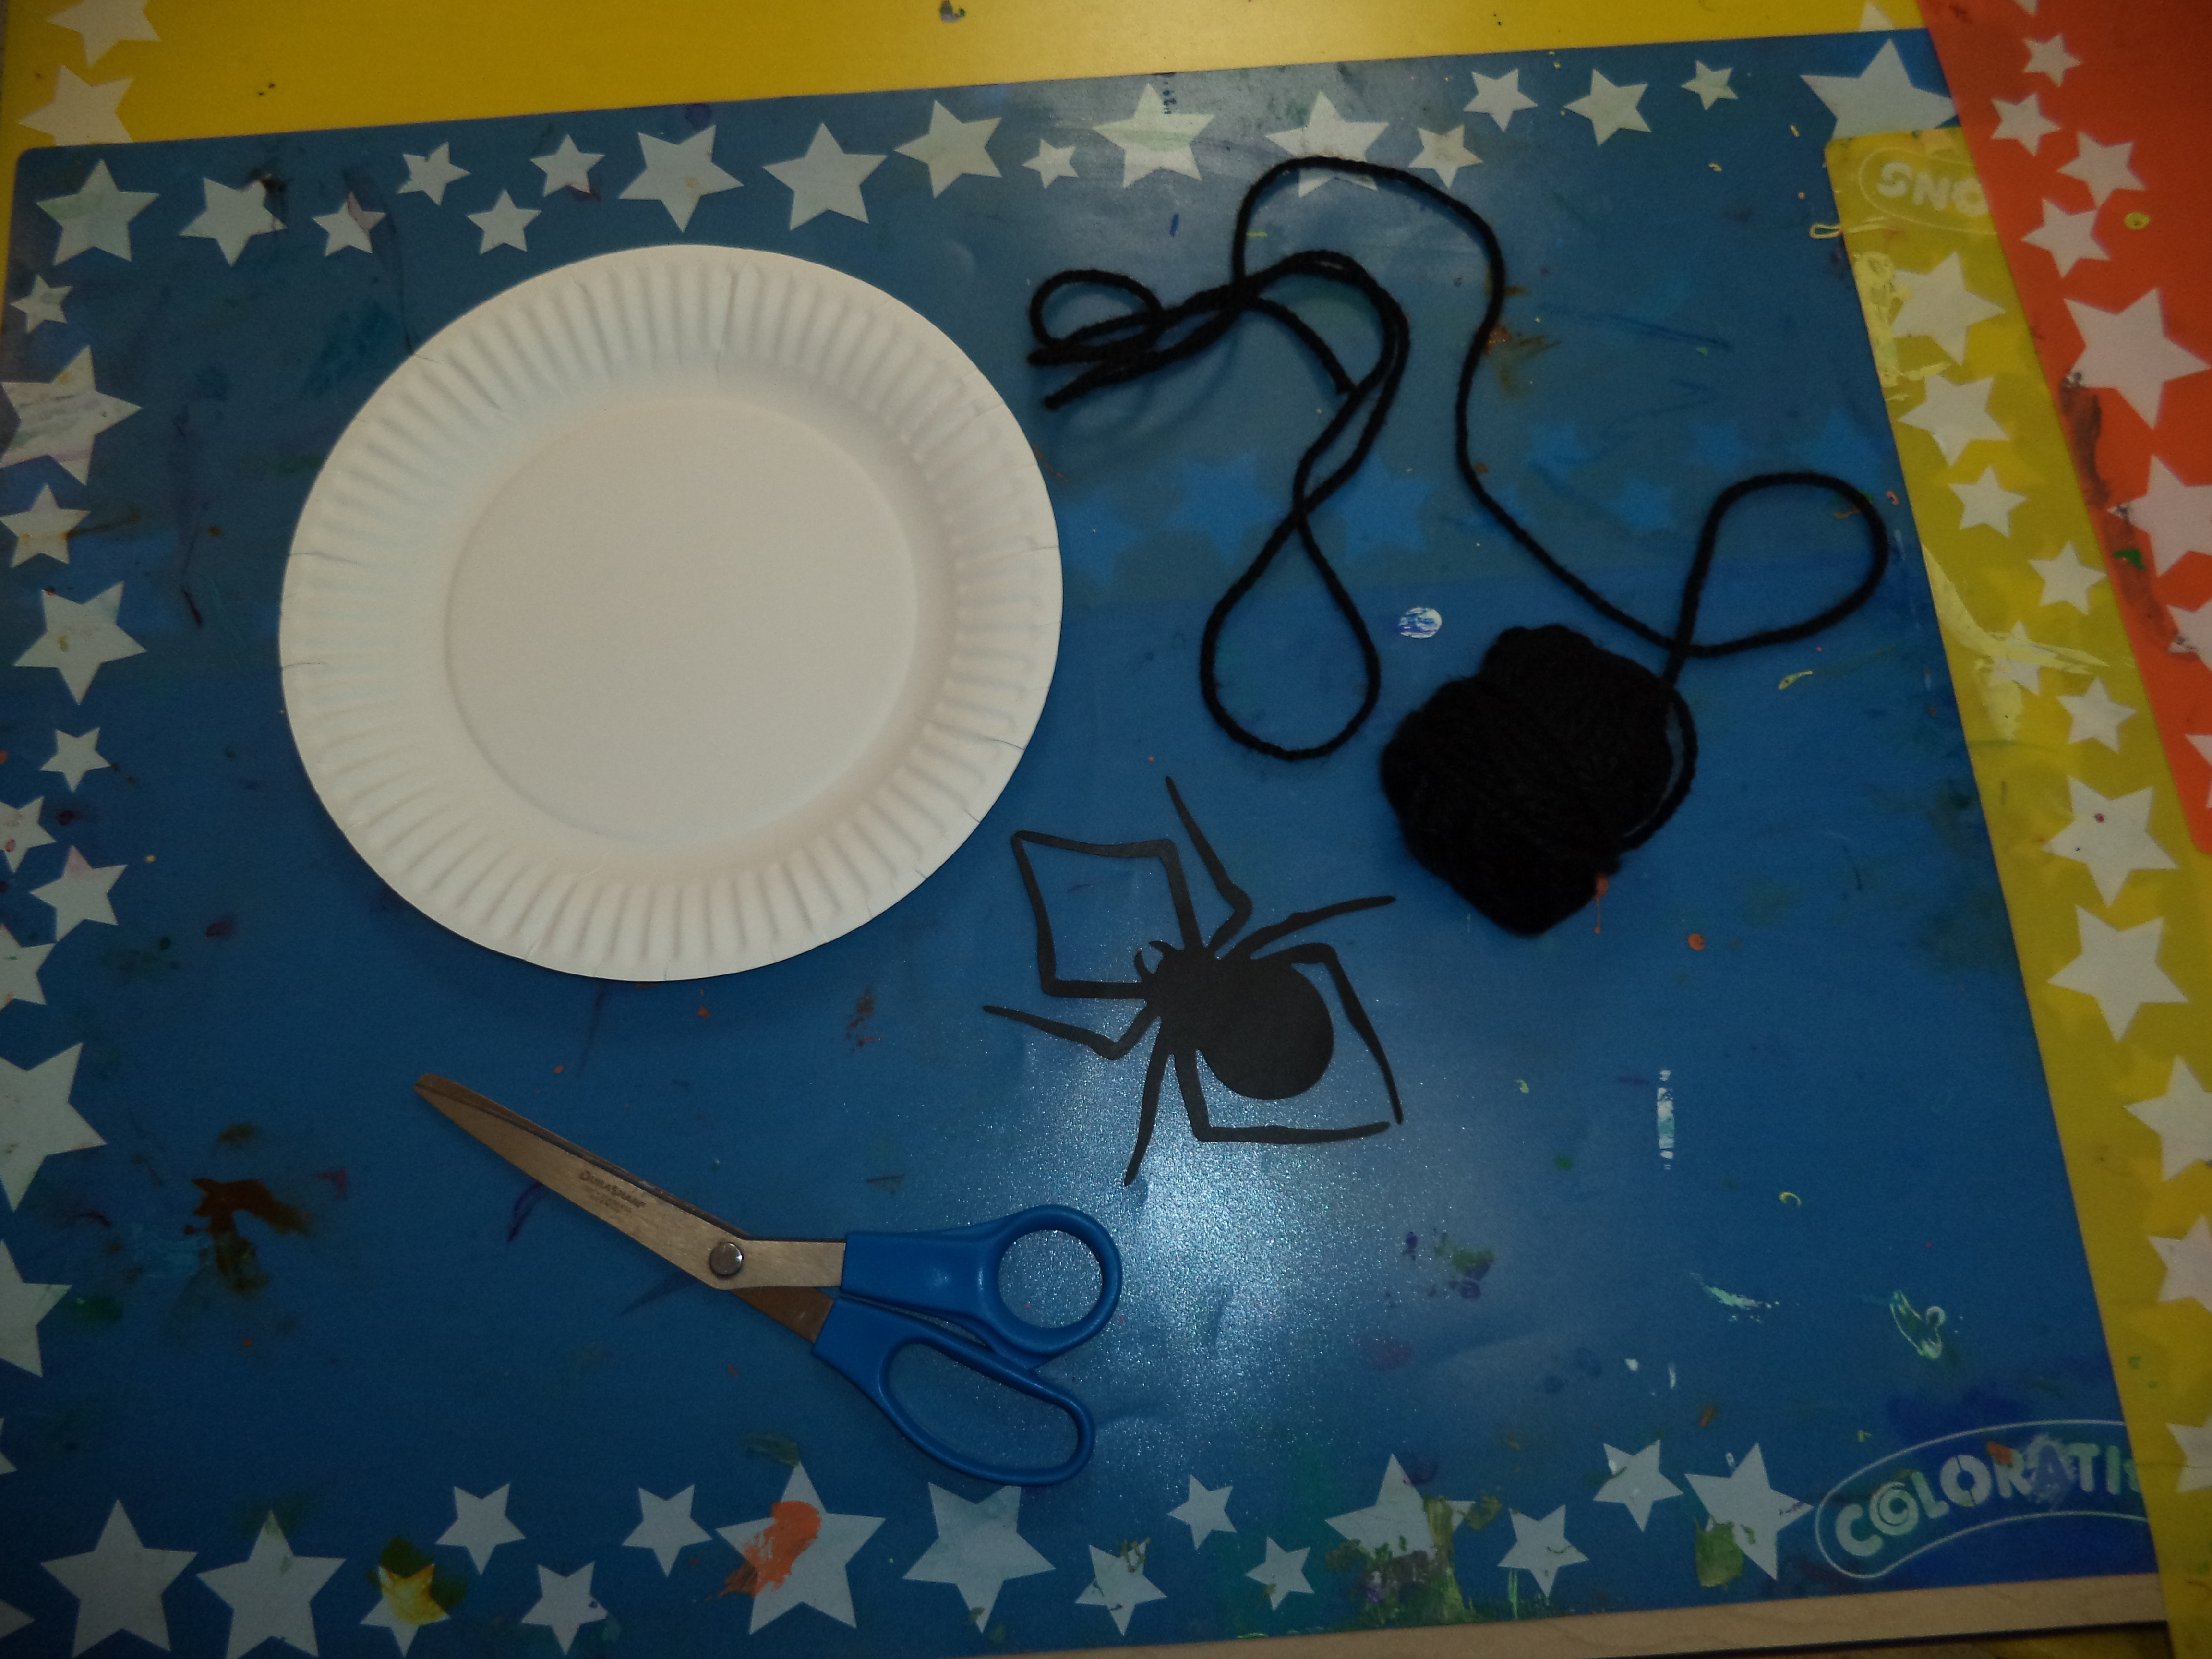
Here’s our SPIDER WEB WEAVING CRAFT:
Items needed: – paper plate
– yarn – any color, but thicker is easier to grasp
– paper die cut spider – (we found these at the 99cent store)
– scissors & a glue stick or tape
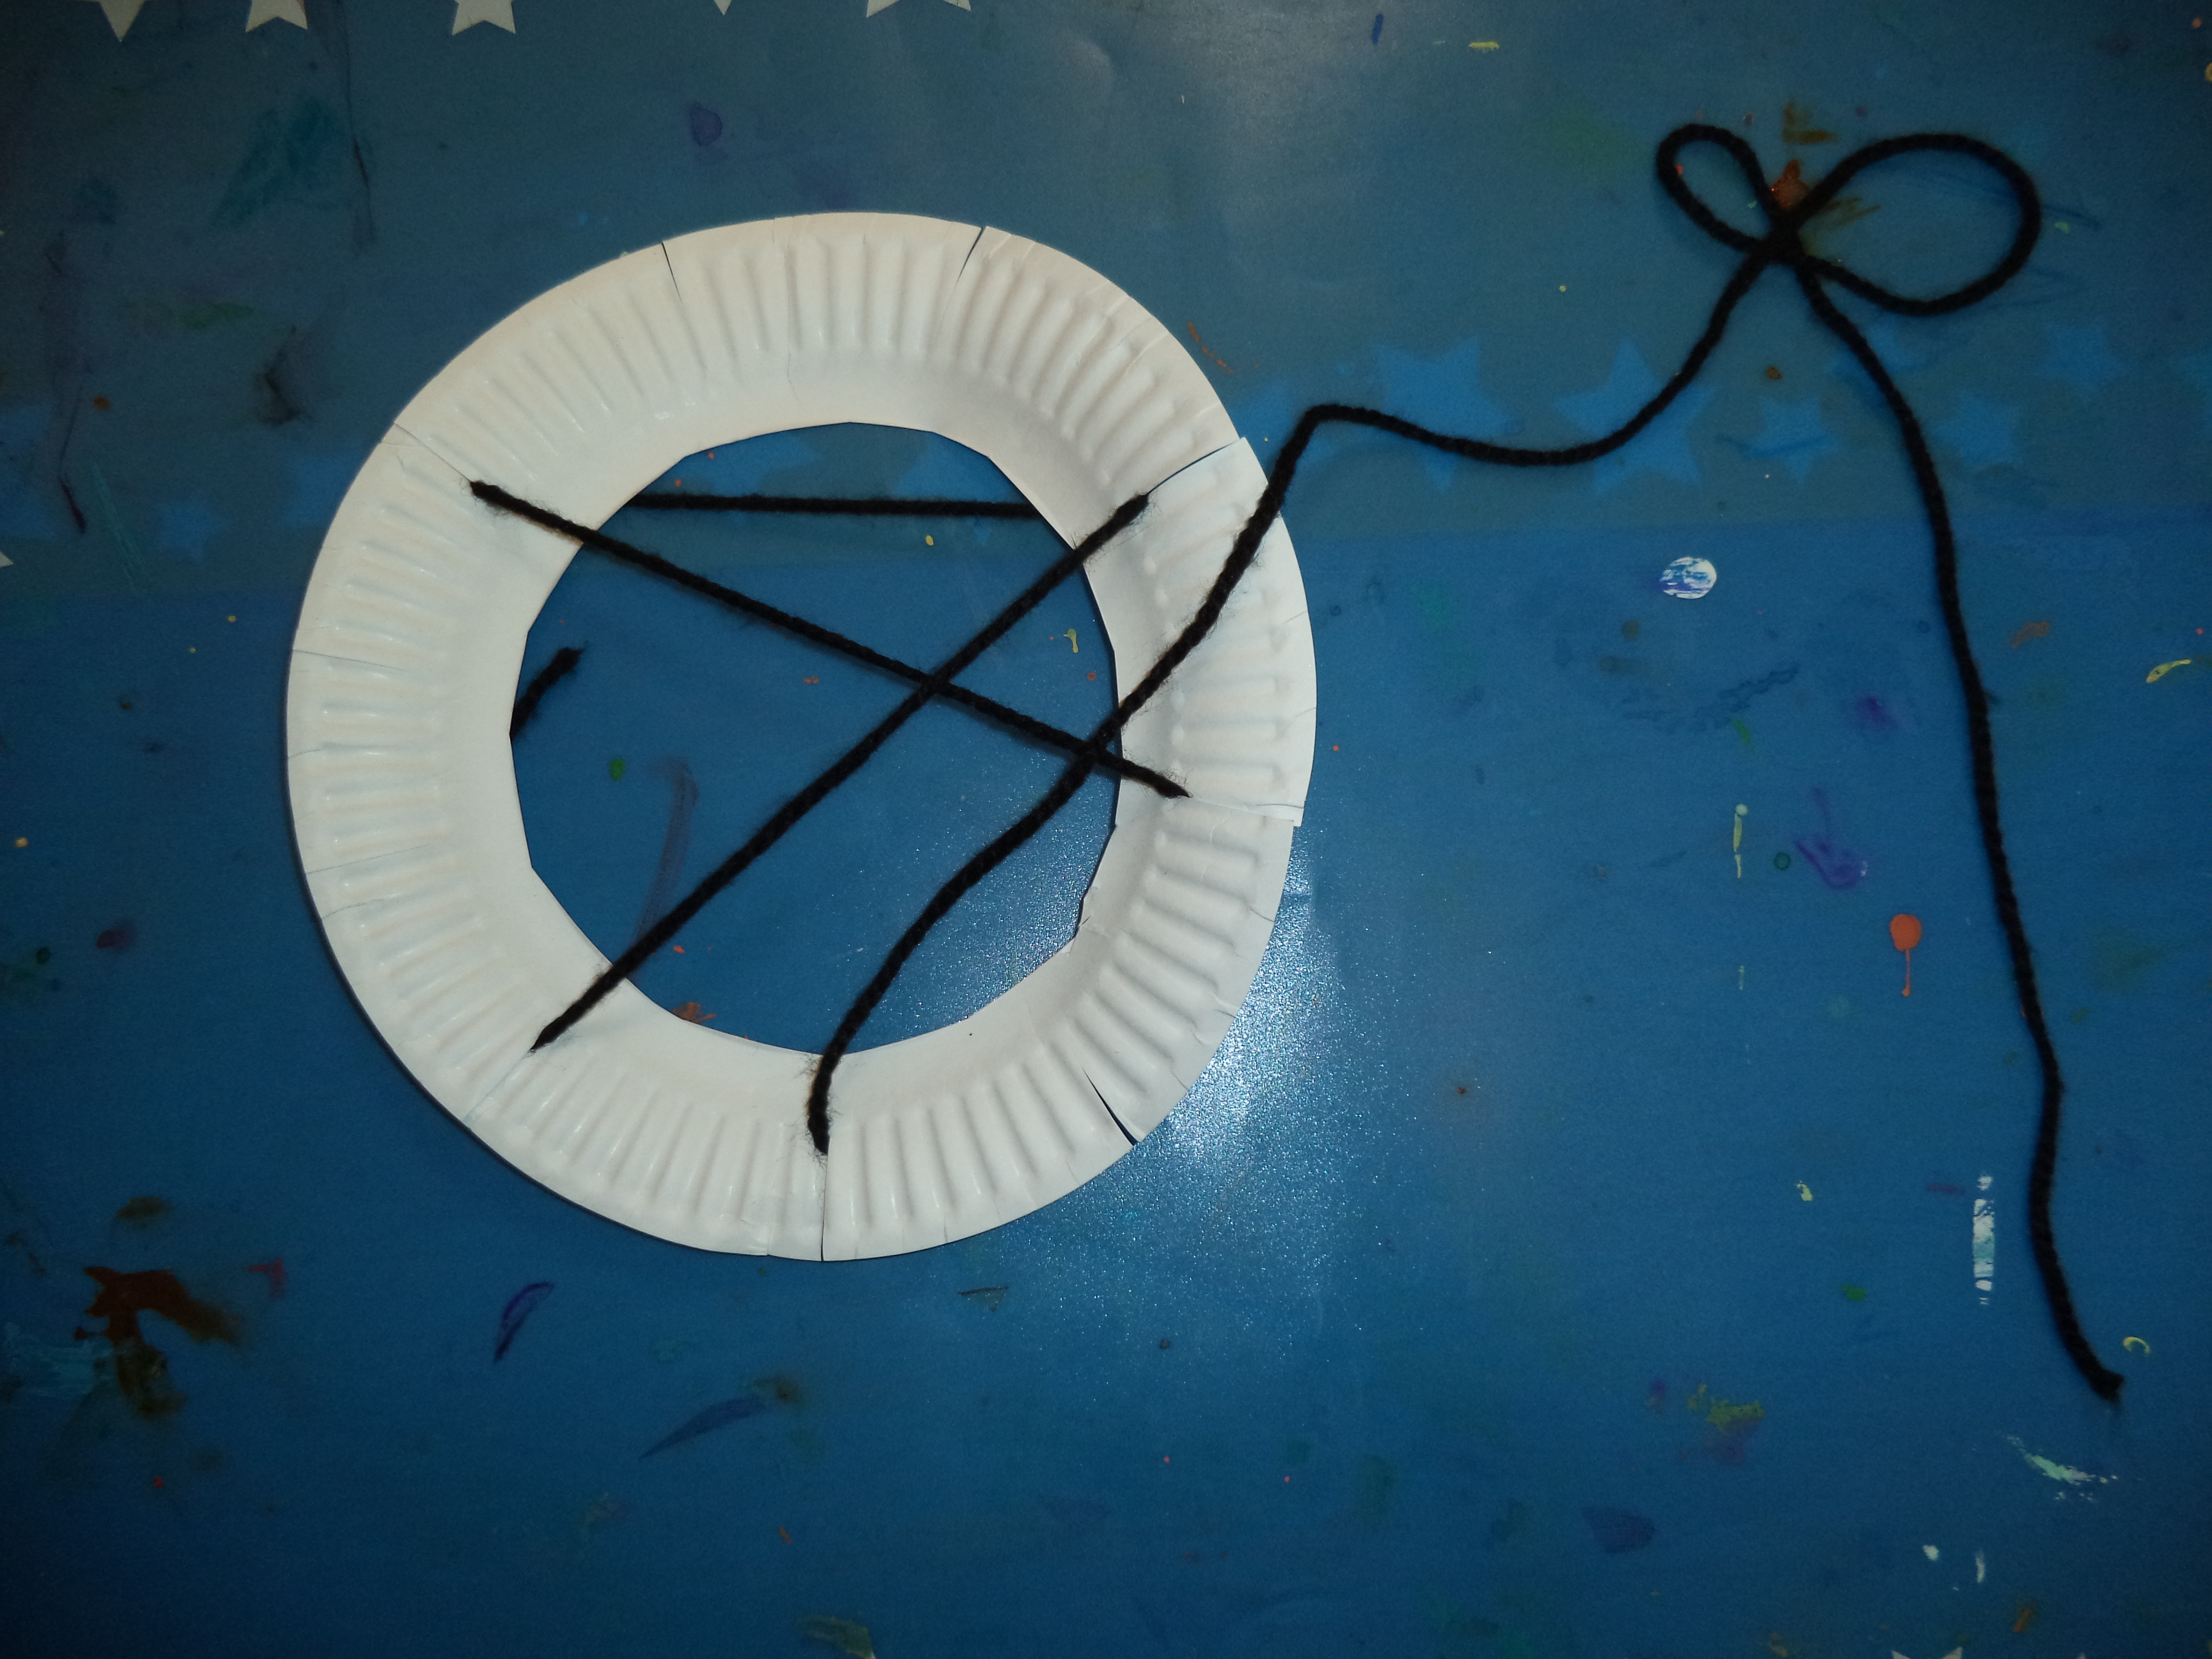
Steps to Create: 1) Cut the center circle out of the plate so that just the bumpy edge is left
2) Have students snip around the edge of the plate, about 1″ deep and 2″
between each snip.
3) Cut about 24″ of yarn and tie a double knot in one end. Help students
catch the knot behind the plate & in between one of the slits. Tape the
knot down if needed.
4) Have students “weave” the yarn across the plate and back and forth
between random slits, creating a web-like design. Show them how to
pull the yarn all the way through to keep it snug between each pass.
5) Once they feel their web looks complete, help them to trim any excess
yarn and secure the end to the back of the plate with a piece of tape. Or
you can leave the end hanging and adhere your spider to that piece.
 6) Attach your spider with glue stick & hang for display! We hung these from the ceiling of our classroom for a cute but creepy October decor.

Here’s our CRINKLY FLYING BAT PROJECT:
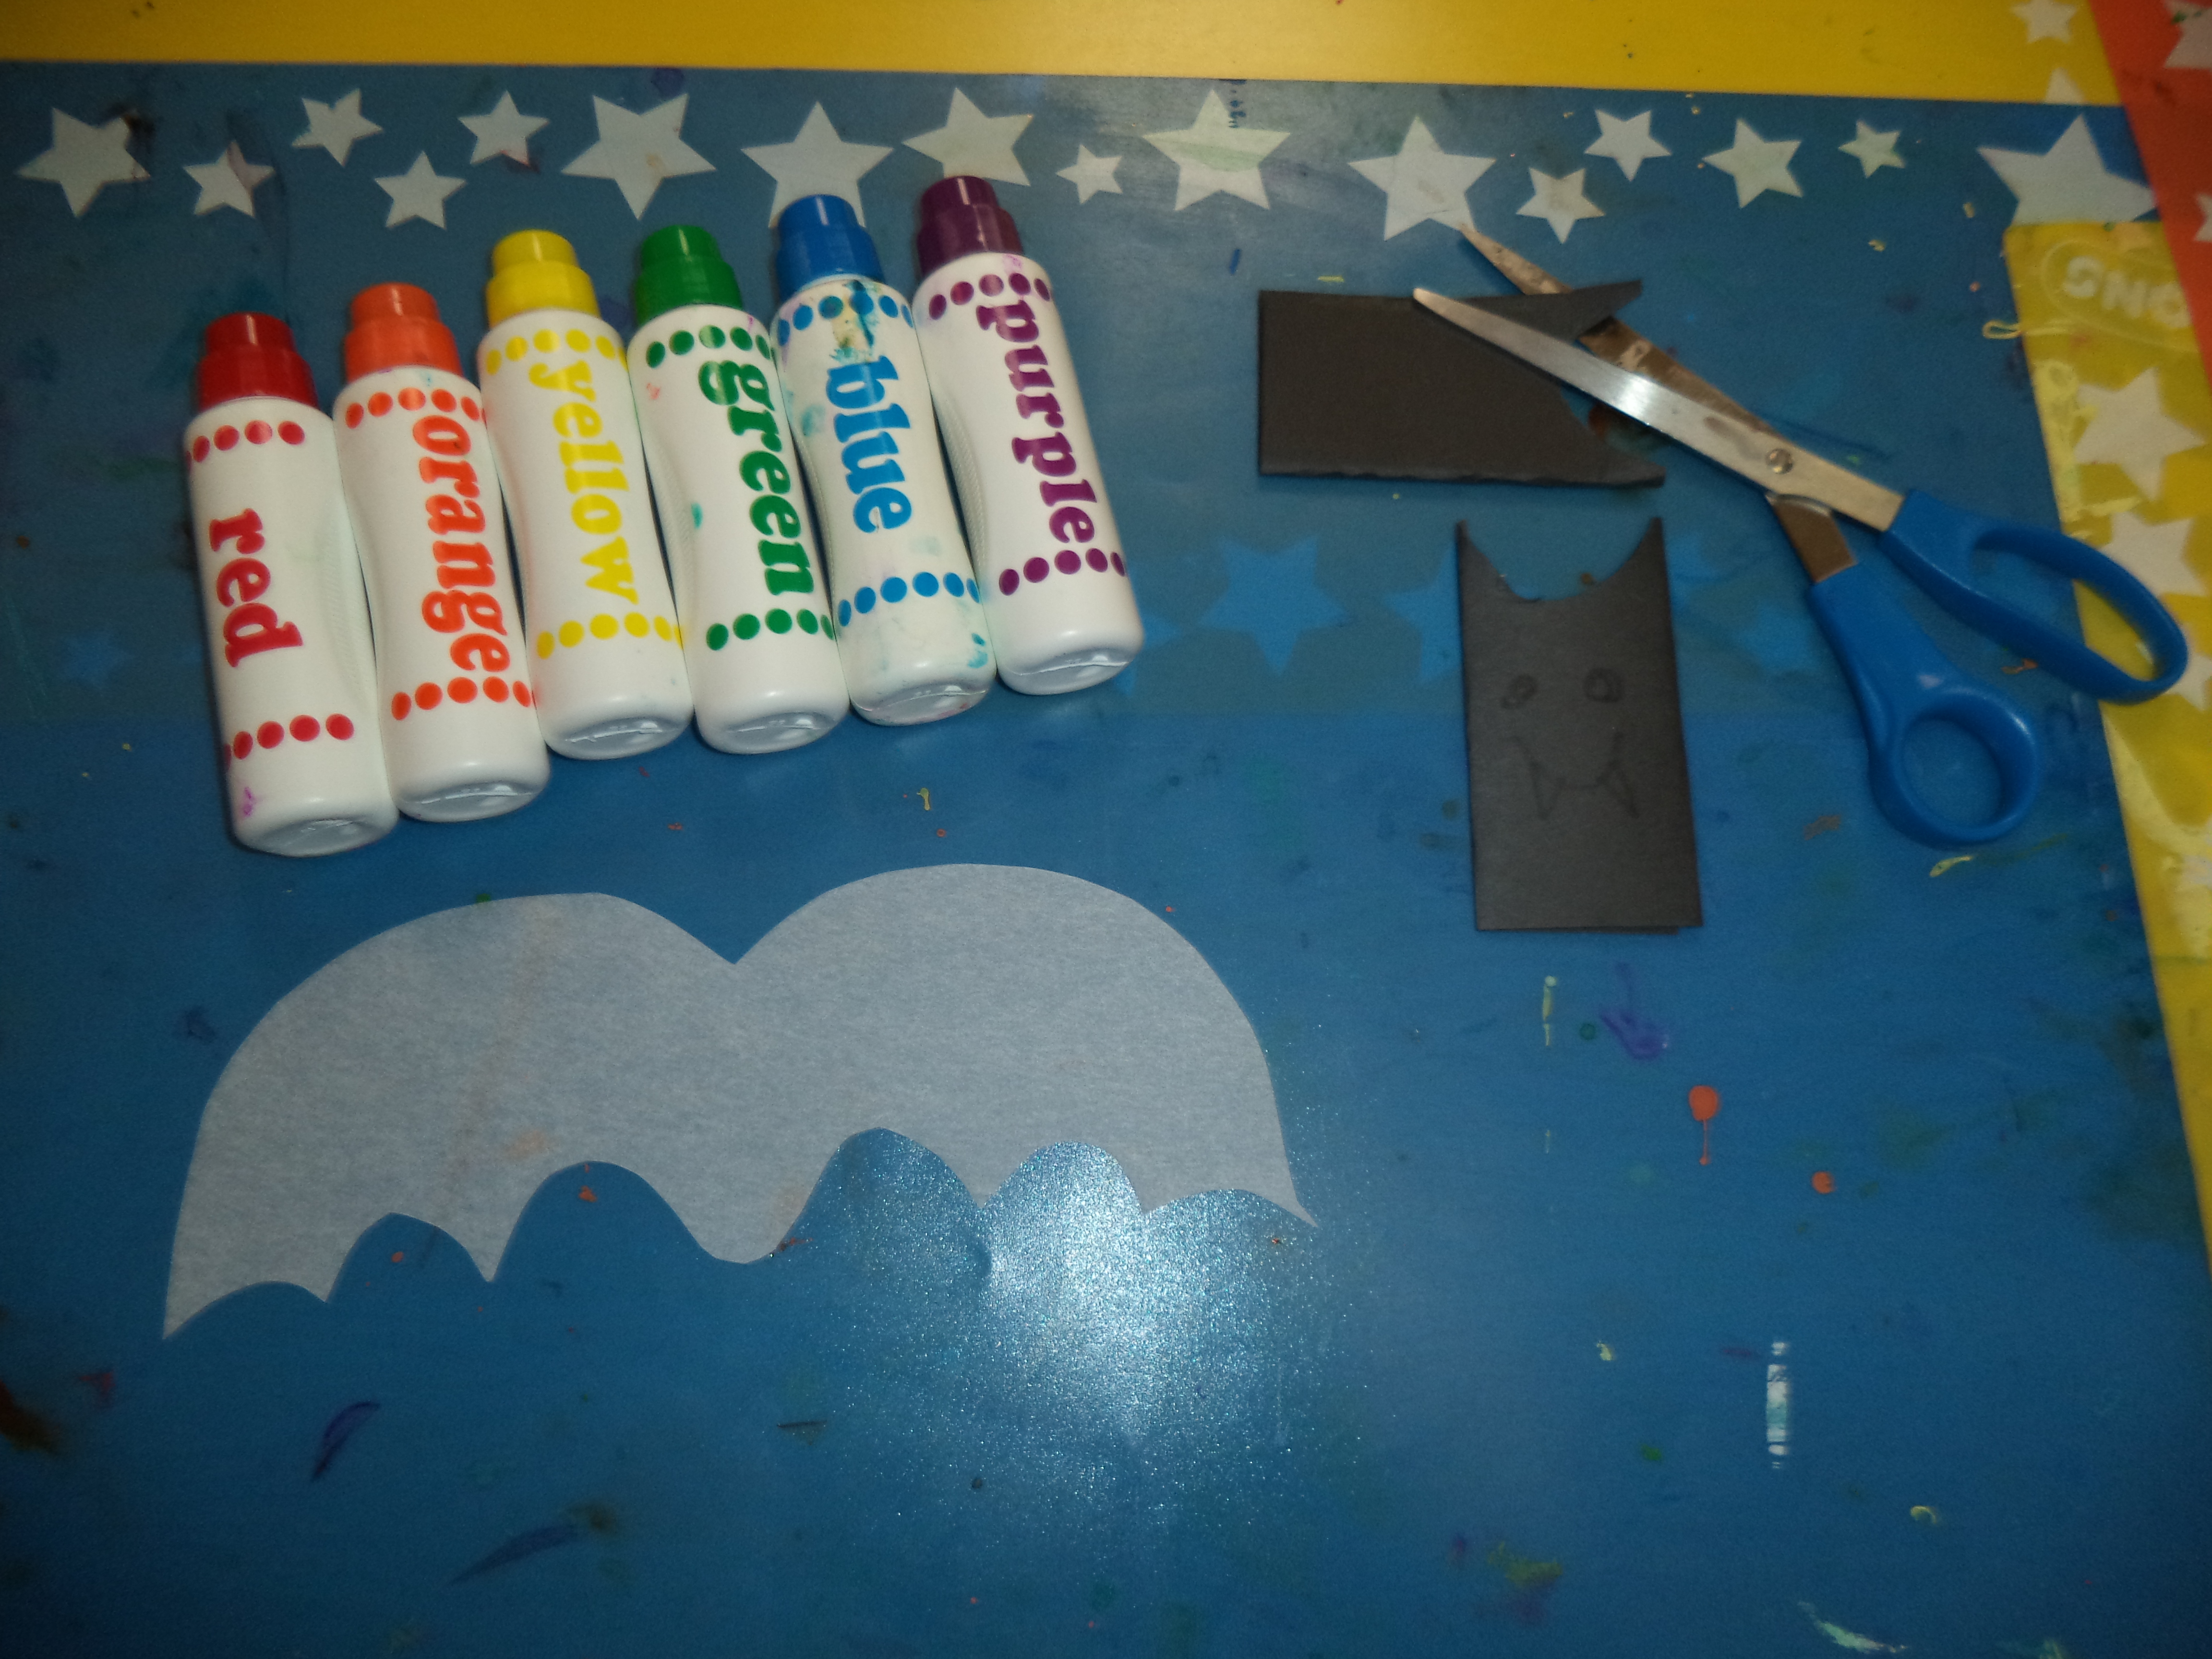
Items needed: – black construction paper
– tracing paper
– wing template (you can create your own with heavy card stock)
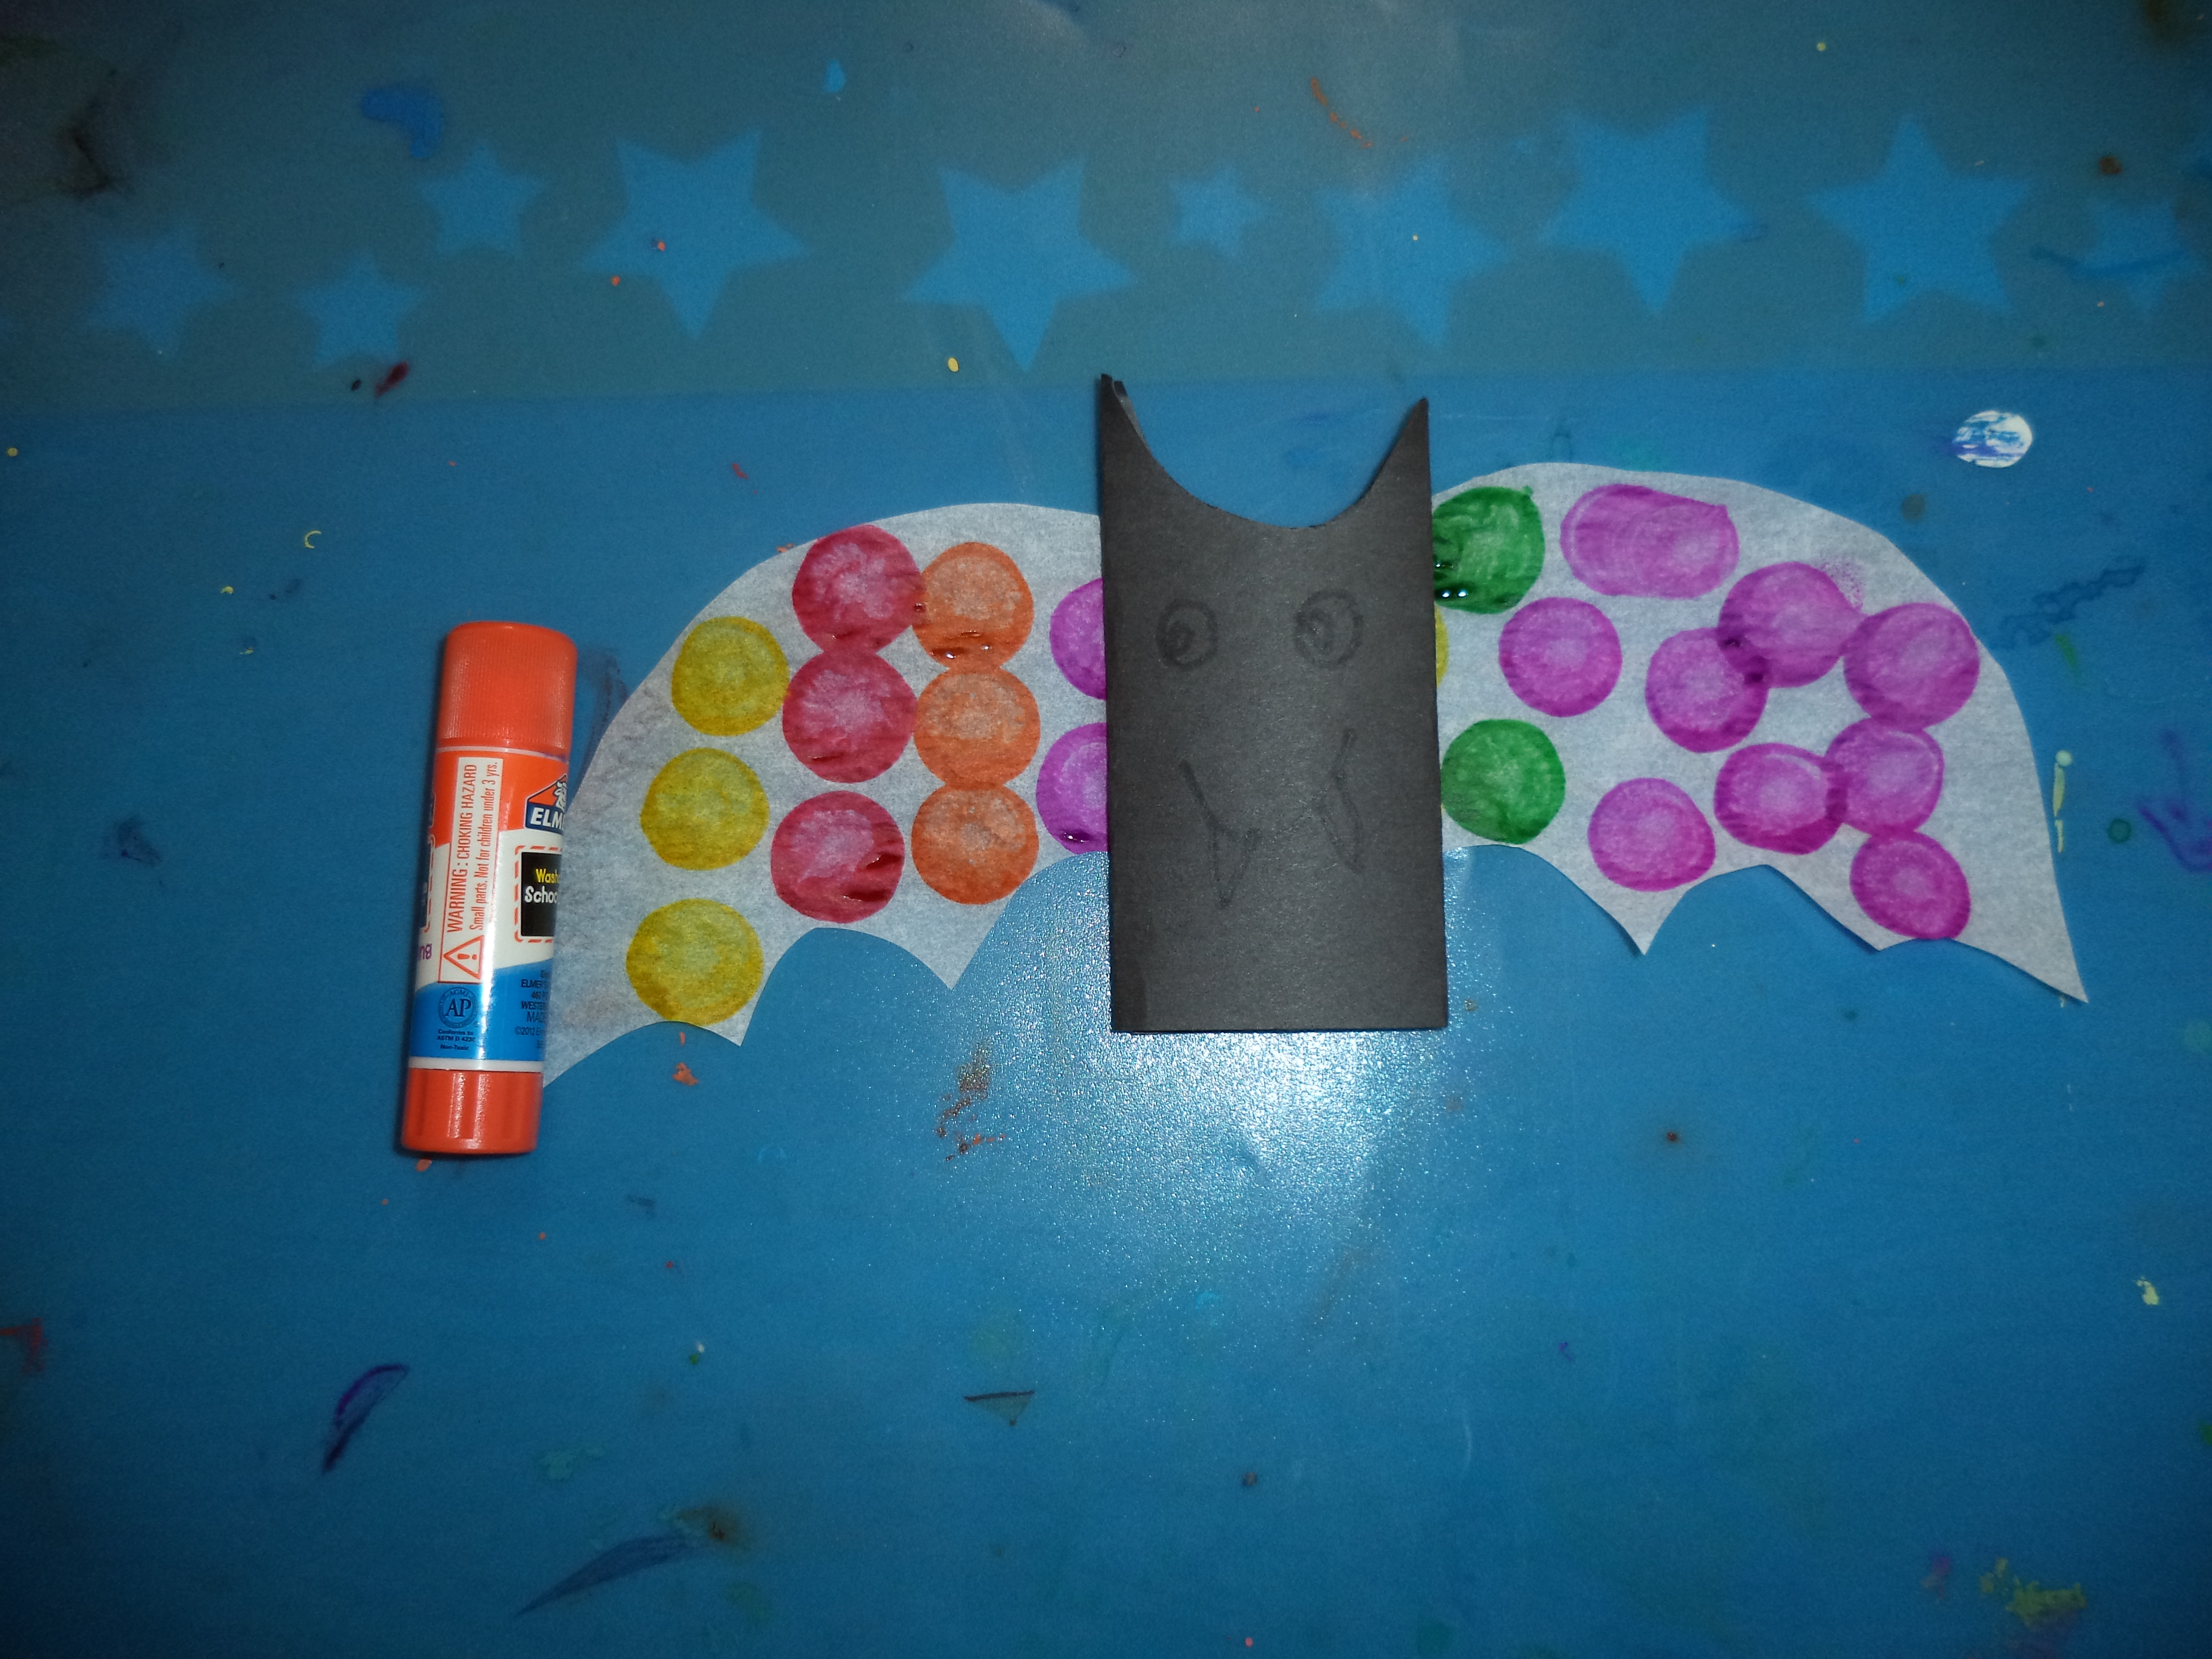
– dot markers, or something else to decorate your wings with
-tape, scissors, & glue stick
 Steps:
1) Cut your construction paper into approximately a 4″ by 3″ rectangle and fold the outer ends in to the middle to meet (like you’d be rolling it into a tube) – flatten your paper tube and secure the ends with tape. You want the kids to be able to fit a few of their fingers inside so they can use it as a puppet with out it falling off.
2) Cut a half circle out of one end of the tube, to make it look like bat ears on either side. Have students draw a face, or adhere googly eyes to their bat.
3) Trace wings onto tracing paper and cut out. Our students are just starting to use scissors and aren’t ready for this yet, but older students could certainly do this themselves.
4) Have students decorate their wings. We used dot markers – they’re bright, dry quick and easy, and work well on tracing paper.
 5) Finally, attach the wings to the body using a glue stick.
6) Have students slip the bat body over their fingers and they can flap the bat up and down to make the wings move and create a crinkly sound. We had all of our students “fly” their bats together during circle time while we all closed our eyes to hear what a bunch of bats flying might sound like – it was really cool!
 Happy Halloween from Incline Village Nursery School!
Leave a Reply